Writing training plans for online clients is not the same as coaching someone in person.
In a gym, you can tap their shoulder blades to cue retraction, adjust their stance, shut down a bad rep before it goes sideways, and change the plan on the fly based on what you see.
Online?
You don’t get that luxury.
All you have is the program you write, the systems you use, and the standards you hold yourself (and your staff) to.
That’s why having clear training principles is non-negotiable—especially if you’re an online coach who wants to deliver world-class results, retain clients long term, and scale beyond just yourself.
Training principles are SO crucial, but it’s still only one part of the process. See how this fits into a complete, results-driven system, in our [Ultimate Guide to Online Fitness and Nutrition Coaching].
In this article, I (Cody McBroom, founder of Tailored Coaching Method and host of the Choose Hard Podcast) am breaking down 12 training principles I use personally, teach my team, and mentor other coaches on, when it comes to writing online training programs.
These are the filters every program should pass through before it ever lands in a client’s app.
[you can also listen to this episode, on Spotify and Apple]
Why You Need Principles (Especially As an Online Coach)
Most coaches think their “system” is just being good at writing workouts.
But if you:
- Don’t have standards for movement patterns, loading, volume, and progression
- Don’t have rules around what you always do and what you never do
- Don’t have frameworks that your staff can use to replicate your results
…then you don’t really have a system. You just have “vibes” and experience.
That might work for a while, but:
- It doesn’t scale to a team.
- It doesn’t protect your clients from overuse issues or nagging pain.
- And it makes your programming inconsistent and inefficient.
These 12 principles fix that. They:
- Make your programming safer.
- Make progression more predictable.
- Give your clients better buy-in and better results.
- Give you a repeatable internal SOP for training design.
Steal them, adapt them, or use them exactly as-is. The goal is to raise the standard of online coaching.
Let’s get into it.

Principle 1: Use 4–6 Week Training Blocks
We program in 4–6 week blocks (mesocycles). Every program your client runs lives inside one of these blocks.
Why 4–6 weeks?
1. It aligns with real-world billing and communication
Most online coaching is billed on a 4-week or monthly cadence. Programming the same way:
- Keeps your workload predictable.
- Prevents you from programming weeks of work you’re not yet being paid for.
- Makes check-ins and program updates easier to plan.
2. It matches how people actually progress
Here’s how a typical four-week block plays out:
- Week 1 – Learn the movements
New variations, new sequencing. Load is conservative. Focus is on skill and coordination. - Week 2 – Groove the pattern
Same exercises, same loads or slight bump, but now the client feels more confident. They might add a rep or two (double progression). - Week 3 – Push progression
Load increases, reps stay in the same range. This is usually the highest quality training week. - Week 4 – Overreach (or solid peak)
You push effort a bit harder, flirt with lower RIR, and really milk the block for progress.
From there, you either:
- Move into a new block with new (or slightly tweaked) variations, or
- Extend the block to 5–6 weeks if the client is still progressing well and life hasn’t interfered.
Anything shorter and they never get past the “just learning” phase. Anything much longer and you risk boredom, overuse, and diminished returns.
How to apply it:
- Program in 4-week blocks by default, with the option to extend to 5–6 weeks if performance is still climbing.
- Treat Week 1 of a new block as a “built-in deload” via lighter loads and skill focus instead of formal deload weeks every month.
Principle 2: Anchor Every Week Around Push, Pull, Hinge, Squat
Your programming should always prioritize the big movement patterns:
- Push (horizontal & vertical)
- Pull (horizontal & vertical)
- Hinge (hip-dominant)
- Squat (knee-dominant)
These are the bread and butter of functional training and long-term strength.
Why it matters:
- It keeps your program balanced (no “all chest, no back” weeks).
- It ensures you’re training the body in patterns, not just muscles.
- It gives you a clear checklist:
“By the end of the week, did the client squat, hinge, push, and pull?”
Example:
- Upper/Lower Split
- Lower days: Always have at least one squat and one hinge pattern.
- Upper days: Always have at least one push and one pull (preferably both horizontal and vertical over the week).
- Full Body Split
Each session:- One lower pattern (squat or hinge)
- One push
- One pull
If a client “can’t squat,” that’s not a green light to never squat them. It’s a signal to regress and fix what’s limiting them—mobility, stability, trunk strength—and rebuild the pattern.
How to apply it:
At the end of writing a week of training, quickly audit:
“Where’s the push? Where’s the pull? Where’s the hinge? Where’s the squat?”
If any pattern is missing, fix it.
Principle 3: Use a Double Progression Model
Progression should be simple and repeatable—especially online, where you’re not standing there to push them.
That’s where double progression comes in.
Instead of forcing load increases every week and watching them implode, you give them:
- A rep range (e.g. 8–10 reps)
- A target RIR (e.g. 1–3 reps left in the tank)
And you progress in two layers:
- First, fill the rep range with the same weight
- Then increase the load and drop back to the bottom of the rep range
Example on an 8–10 rep range:
- Week 1: 3×8 @ 100 lbs (RIR 2–3)
- Week 2: 3×10 @ 100 lbs (same load, more reps)
- Week 3: 3×8 @ 105–110 lbs
- Week 4: 3×9–10 @ 105–110 lbs
For higher rep ranges (e.g. 12–15, 15–20), the range can widen slightly to accommodate metabolic fatigue and individual differences.
Why double progression works so well online:
- It auto-regulates intensity based on how the client feels that day.
- It gives them multiple ways to win (more reps or more load).
- You’re not locked into “you must add 5 lbs this week no matter what,” which is how injuries and missed reps happen.
How to apply it:
Assign rep ranges instead of fixed reps for almost everything.
- In check-ins, ask clients:
“Did you hit the top of the rep range with ease? If so, it’s time to add load next week.”
Principle 4: Use Intelligent Exercise Sequencing

(Activate → Prime → Compound → Accessory → Metabolic)
Exercise order is more than just “big lifts first.”
We use this sequence:
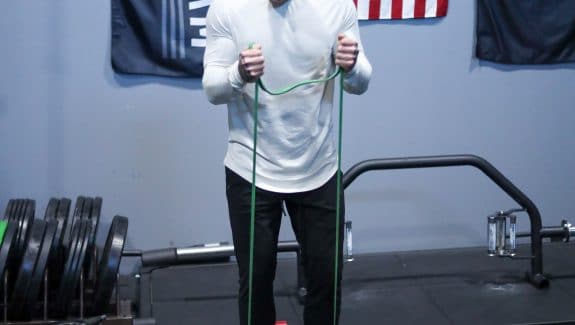
- Activate – low-load, band/bodyweight drills
- Prime – explosive or power-based movement
- Compound – main strength lift of the day
- Accessory – secondary, muscle-focused or pattern-supporting lifts
- Metabolic – finishers, isolation work, conditioning
Why this matters:
- You prepare the joints and tissues before heavy loading.
- You intentionally ramp nervous system activation (via primers) before heavy compounds.
- You hit the most neurologically demanding work while the client is fresh, and save “burner” metabolic work for the end.
Example upper body day:
- Activate: band face pulls, over-and-backs
- Prime: explosive push-ups or med ball chest throws
- Compound: barbell bench press
- Accessory: DB rows, incline DB press, chest-supported rows
- Metabolic: high-rep lateral raises and triceps pressdowns
How to apply it:
When reviewing a session, ask:
“Does this flow from low load → high skill/force → muscle work → burners?”
If not, reorder it until it does.
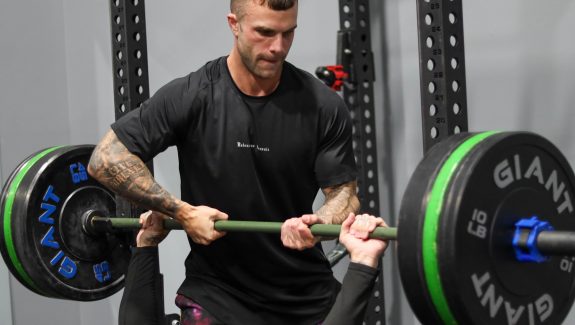
Principle 5: Pull 1.5× More Than You Push
Most clients come to you with:
- Rounded shoulders
- Tight pecs
- Weak mid/upper back
- A history of “chest and arms” being trained more than anything else
And honestly, if they don’t come to you with that… it’s still worth treating them as though they have a small degree of any one (or all) of those symptoms! Because it’s that common for people to have or slowly experience overtime.
So as a global rule, we program:
1.5× more pulling volume than pressing volume, especially horizontally.
Example:
- If the client has 3 pressing sets, we aim for 4–5 pulling sets.
- If they have 4–5 pressing sets, we aim for 6–8 pulling sets across the week.
This ratio:
- Improves posture
- Reduces shoulder pain over time
- Makes their pressing stronger
- Builds a better-looking physique front and back
You can also “hide” extra pulling in:
- Activation (band pull-aparts, face pulls)
- High-rep finishers (cable rows, rear-delt work)
How to apply it:
When a week is written, count:
- Total press sets vs pull sets
- Then adjust until pulls win by ~1.5x.
Principle 6: Include at Least One Unilateral Exercise Every Session
Life is unilateral.
We walk, run, change direction, get bumped, and catch ourselves one leg at a time. We carry groceries on one side. We rotate, shift, and compensate.
Unilateral work:
- Exposes and improves left/right imbalances
- Reduces joint stress by distributing load differently
- Builds more functional stability through the hips, knees, ankles, and trunk
Examples:
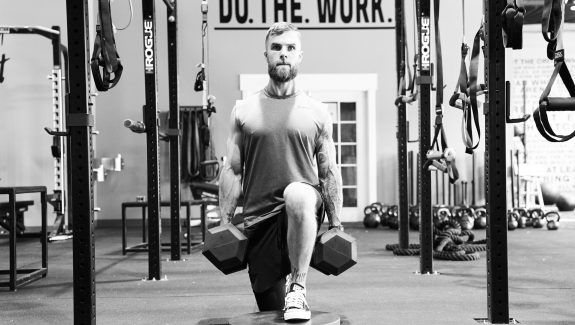
- Lower: split squats, reverse lunges, step-ups, single-leg RDLs
- Upper: single-arm rows, single-arm presses, offset carries
How to apply it:
Make it a rule: every session gets at least one unilateral lift.
- For clients with a history of injuries, consider building sessions around two unilateral movements.
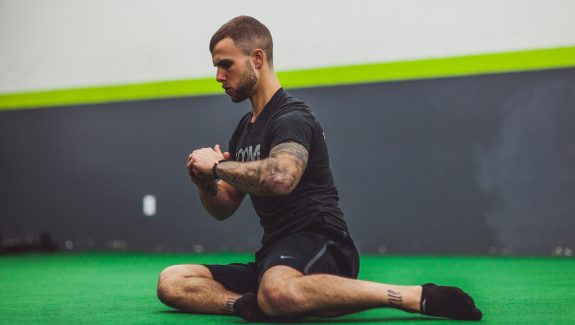
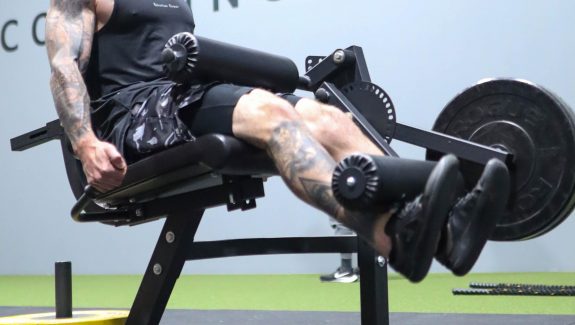
Principle 7: Implement One ZOA (Zone of Apposition) Exercise Every Session

This one is about position.
Zone of Apposition (ZOA) refers (simplified) to a stacked position of:
- Rib cage over pelvis
- Neutral-ish spine
- Trunk stability and pressure managed well
In online training, you can’t walk over and fix a client’s rib flare, extension bias, or sloppy trunk position mid-set. But you can use exercises that force good positions.
Examples of ZOA-friendly exercises:
- Half-kneeling landmine press
- Tall-kneeling cable row
- Front-racked kettlebell reverse lunge
- Goblet squat with proper bracing
In these positions:
- If they over-extend, the weight pulls them out of position or feels awkward.
- If they flex too hard, they physically can’t execute the movement well.
- The exercise itself teaches them where “good” is.
How to apply it:
Add one ZOA exercise to every session—often as an accessory movement.
- Cue: “ribs down, pelvis stacked, brace first, then move.”
Principle 8: Don’t Repeat the Same Loading Pattern in a Single Session
This is about how the load is applied, not just how much.
Example loading patterns:
- Barbell on the back
- Barbell in front rack
- Dumbbells/kettlebells at the sides (suitcase)
- Offset loading (one side only)
- Front-racked kettlebells
- Overhead loading
If you’re not careful, you can end up with:
- Back squat
- Good morning
- Barbell lunge
All in one session—hammering the same loading pattern and spinal position repeatedly.
That’s a recipe for overuse issues, especially online where you’re not there to adjust things in real time.
How to apply it:
Within a session:
- Mix loading styles. For example:
- Compound: barbell back squat
- Accessory 1: DB or KB RDL (load at sides)
- Accessory 2: front-racked KB reverse lunge
- Finisher: single-arm suitcase carry
Don’t stack multiple heavy bar-on-back or heavily extended positions in the same workout.
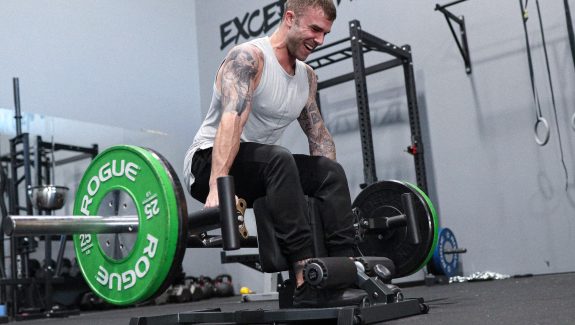
Principle 9: Include 1–2 Stretch-Biased (Lengthened) Movements Per Session
Hypertrophy research consistently points toward the lengthened position being extremely powerful for muscle growth.
In practice, that means:
Training muscles in the stretched position under load is a big win.
Examples:
- RDLs (hamstrings in a deep stretch)
- Deep leg presses or hack squats
- Deficit split squats or reverse lunges
- Incline DB curls
- Cable flyes with a deep stretch
- Overhead triceps extensions
You don’t need the whole session to be “stretch-focused,” but you absolutely should be intentional about plugging these in.
How to apply it:
Program 1–2 movements per session that clearly train a muscle in its lengthened position.
- For clients chasing physique goals, make sure key target muscles get a stretch-biased movement every week.
Principle 10: Program 1–2 Aerobic Conditioning Sessions Per Week (30–45 Minutes)
Lifting + 7–10k steps is good.
Lifting + dedicated aerobic work is better.
We’re talking:
- Easy–moderate steady state (Zone 2)
- 30–45 minutes
- 1–2 times per week
Why it matters:
- Improves cardiovascular health and longevity
- Enhances recovery between sets and sessions
- Boosts circulation, which improves pumps and nutrient delivery
- Helps manage blood sugar and body composition
- Makes it easier for clients to handle higher volume blocks down the road
There’s even research showing that when one limb is both strength-trained and exposed to repeated aerobic work, it develops more muscle due to enhanced mitochondrial and oxidative capacity.
How to apply it:
Standard prescription:
- 1 aerobic day for everyone
- 2 aerobic days for those with fat loss or health as a clear priority
- Choose modes that are joint-friendly for the client: bike, incline walk, rower, light jog, etc.
Principle 11: Set Weekly Volume at 10–20 Sets Per Muscle Group
Volume doesn’t have to be complicated.
A solid evidence-based range for hypertrophy is:
~10–20 hard sets per muscle group per week
But think of it as a curve, not a rule carved in stone:
- Newer lifters: Start closer to 10 sets per week for target muscle groups
- Intermediates: Progress toward 12–16+ sets as they adapt
- Advanced trainees: Often build best with moderate volume (e.g. ~12–18 sets) because load and quality are higher, and fatigue is real
Programming beyond 20+ hard sets per week per muscle group usually:
- Beats up joints
- Eats into recovery
- Delivers diminishing returns
How to apply it:
Choose the client’s primary physique priorities (e.g. glutes, chest, back).
- Ensure those muscles get at least 10 quality sets per week, progressing toward ~15+ over time.
- Secondary muscles (e.g. arms, calves) can sit a bit lower unless they’re specifically targeted.
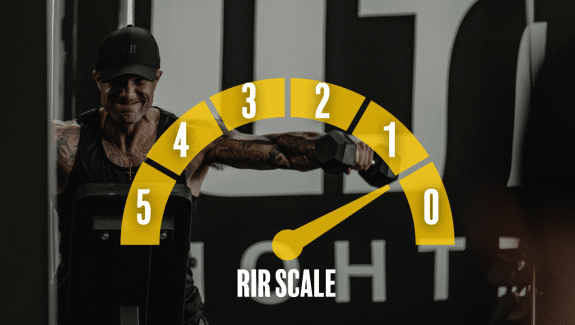
Principle 12: Use the RIR Scale (Reps in Reserve) for All Lifts
You can’t stand next to an online client and say, “You had three more in you.”
But you can train them to think that way.
That’s what RIR (Reps in Reserve) does.
- RIR 0 = No reps left. True failure.
- RIR 1 = One rep left in the tank.
- RIR 2–3 = Hard, but not gut-busting.
- RIR 4+ = Mostly warm-up / low effort.
Compared to RPE, RIR is:
- Easier for most general population clients to understand.
- Directly tied to the reps they’re actually doing.
- A better fit for online coaching, where clear, objective cues help you bridge the distance.
Why it’s powerful:
- You can prescribe intensity very clearly:
- Compounds: 1–3 RIR
- Accessories: 1–2 RIR
- Isolation / metabolic work: occasionally 0–1 RIR
- You can run intentional “test weeks” where you tell them to take a set to RIR 0 to recalibrate what hard actually feels like.
- It helps you see which clients consistently under-train so you can call them on it (in a supportive way).
How to apply it:
Attach RIR to almost every working set in your programs.
- In check-ins, ask: “On your main lifts, were you honestly at 1–2 RIR, or do you think you left more in the tank?”
- Use periodic failure sets on safe exercises (machines, cables) to re-anchor their perception or have them film their final set of an exercise, while giving you their own opinion of their RIR in the set—then assess their RIR yourself, with them.
If this one is difficult for you to fully understand or implement, just go read my full length article on understanding and implementing RIR or watch my video on it below:
Putting It All Together
These 12 principles aren’t random ideas. They’re filters.
Before a program goes to a client, you should be able to say “yes” to:
- Is it written in a 4–6 week block with a clear progression plan?
- Does it cover push, pull, hinge, squat every week?
- Is progression built around double progression + RIR?
- Does the exercise order follow Activate → Prime → Compound → Accessory → Metabolic?
- Is the client pulling 1.5× more than they push?
- Does every session include unilateral work and one ZOA exercise?
- Are loading patterns varied within the session?
- Does each workout include 1–2 stretch-biased movements?
- Is the client doing 1–2 aerobic sessions per week?
- Is weekly volume between ~10–20 sets per muscle group, based on their experience level?
- Are all working sets prescribed with RIR so intensity is clear?
If the answer is “no” on any of these, you have a really clear roadmap for what to tighten up.
If you’re an online coach who wants help implementing systems like this inside your business—so your programs, your check-ins, and your client results are all operating at a higher standard—that’s exactly what I do inside my mentorship.
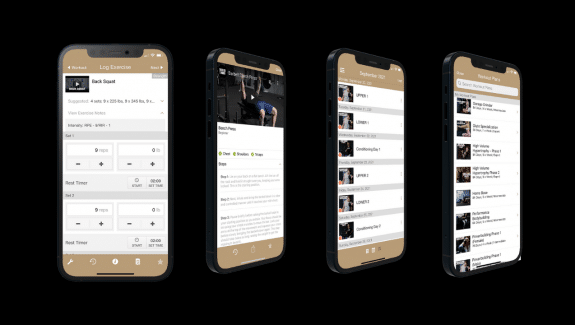
And if you’re someone who doesn’t need mentorship for your own coaching and coaching business, but maybe you do need more direction in your weekly training—I have two value driven opportunities for you. You can apply for individualized coaching with myself and my team or you can download the Tailored Trainer App where you can get a 7-day free trial to access my training software and my training plans.
Don’t forget to connect with me on Instagram @codymcbroom where I drop short-form content just like this, too!
Now go audit your current programs against these 12 principles—and fix what needs fixing.
| <span style=”background-color: #ffcc04;”>* 2026 Content Refresh Note: As tracking apps and digital programming continue to evolve, behavioral adherence modeling has become just as critical as your macro periodization. When constructing online client programs, ensure you are embedding qualitative feedback metrics (like mood and stress monitoring) alongside quantitative load parameters to protect long-term behavioral compliance.*</span> |