How To Get 6-Pack Abs
When it comes to achieving a 6-pack… the best strategy is overly simplistic and massively frustrating. It goes something like this:
1. Calorie Deficit.
2. Calorie Deficit.
3. Calorie Deficit.
4. Calorie Deficit.
5. TRAIN YOUR ABS.
But as annoyingly-simplistic as that advice is, it’s pretty damn true. You NEED to lose body fat in order to achieve visible abs. And although training your abs is important and can be helpful (which I promise to outline, in mass-detail for you, in this article) — the reality will still be that if you have a layer of body fat over your abs, your 6-pack will be harder to see. Plain and simple.
To see how this fits into a complete transformation system, check out our [Ultimate Guide to Online Fitness & Nutrition Coaching].
Which is why I take this simple 3-step approach to helping our clients achieve a 6-pack:
1. Fat Loss Nutrition
Following a good nutrition plan, rather than praying a route that gives you less resistance will get you there (aka the route of doing sit ups as a workout finisher every day to burn belly fat). We simply cannot get away from the simple fact that a calorie deficit in order to lose body fat over time, to sustain a leaner physique, is the key to sustainably seeing 6-pack abs.
In this article, I will not be focusing on the nutrition aspect. I suggest you download our completely free ebook, The Tailored Nutrition Method, or signing up for a free online-coaching strategy call, if you need to dial your nutrition in. It will pay off tremendously and get you 10x closer to seeing your 6-pack than any amount of core exercises ever will.
2. DIRECT AB TRAINING
Once you’ve locked your diet in and lowered your body fat levels, training your abs becomes much more important. In fact, training your abs WHILE LOSING body fat is just as, if not more, important because you will develop them more the further away from a deep calorie deficit you actually are (just like you would build any other muscle, which becomes harder when you’re in a bigger energy deficit).
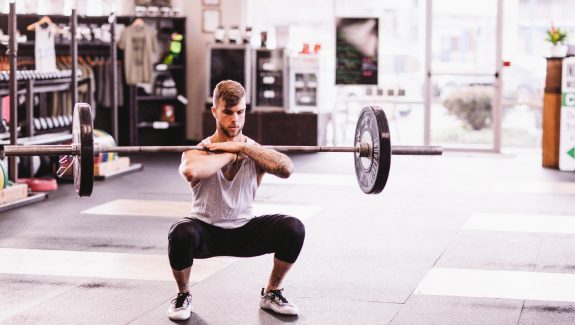
In this article, I’ll be primarily focusing on this aspect of the 3-step process. I am going to show you how to train your abs for function and aesthetics, because you should focus on training to have a strong core AND to train for hypertrophy of the abs. In brief, here are your main training focuses for not just a 6-pack, but a totally shredded (and strong) core: spinal flexion (crunches/knee raises), anti-extension (planks/ab-wheel), and heavy training (carries, front squats, etc.). Keep reading, I’ll be breaking down what those look like and showing you exactly how to implement them into your program today.
3. TIME AND PATIENTCE
Repeat 1 and 2, and BE PATIENT. It takes time to lose stubborn belly fat and that’s ok, because the reward feels 10x as good when the process requires commitment and hard work. So if you truly want to be lean and have a visible 6-pack, you need to fully accept this fact.
Now… onto the most detailed article you’ll find online regarding how to train your abs…

Core Training Vs. Training Your Abs
The 6-pack itself is not the only aspect of your core. The core is a hell of a lot more!
The core is your entire torso, consisting of the pelvic floor muscles, transverse abdominis, multifidus, internal and external obliques, rectus abdominis, erector spinae, and the diaphragm itself.
I know, it’s a lot and kind of sounds confusing. But just think of it as almost everything between your neck and your ass.
Now, there are typically two main reasons why we all talk about and strive to have abs:
#1 – We want to look very lean and aesthetic.
#2 – We want to stop having nagging low back pain.
I’d say that the majority of people who are training in the gym have or have had tight hips and/or lower back pain. Many times, this involves having weak abs and a weak erector spinae as a result of just sitting too often (usually with bad posture).
Sitting (at desks, at home, or in the car) keeps us in a constantly flexed position at the hip, which keeps hip flexors in a flexed and shortened position and, over time, creates more and more tightness in the hip. Further, when people sit, they probably have rounded shoulders and back and likely no firm support on the lower back.
Protecting and strengthening the erector spinae by training the core properly can help overcome these issues and strengthen their core, which is important even if you do not have low back pain and simply want to achieve a visible 6-pack. The reason it’s so important, is because function comes before aesthetics.
Now, you may be thinking… “Uhhh, well… no, no it doesn’t. I just want to look better, man!”
And I get it. However, I still stand by my case for the simple fact that without proper core mechanics and functional strength — you are far less likely to accomplish that aesthetic 6-pack you want! See, when you have proper core strength and function, all the things that help accomplish the aesthetic side of things will come a lot easier to you (as well as for the simple fact that the functional stuff actually develops your abs, too, making it a 2 for 1 special).
This is why “core training” is a little different than “training your abs”. When we think abs, we think 6-pack, and the best way to build your literal six pack is resisted spinal flexion (crunches and knee raises). But that’s not always the best for function, pain rehab or avoidance, stability, or strength. Which is why we need both and what we will cover next is exactly that… how to accomplish BOTH and in what order to do so.
Core Training Hierarchy (Order Of Importance, For Building Abs)
After working as a trainer for many years and studying under some great coaches, I’ve come to discover that they all practice the same principles for core training.
Mostly, they all practice and stress the importance of training the core in a specific order of importance. We’ll get into more details soon, but teaching safe and effective core training in this manner helps build a truly strong, functional, and visible core.
The list below is the principles of core training, in order of importance (starting with the most important).
- Breathing
- Bracing
- Anti-Movement
- Flexion
- Loaded Carries
With this list and the pyramid that follows, you’ll be able to fully understand what exercises and movements are the most important to work on and which ones to implement first (i.e. start with breathing).

The best way to think of building the core is like building a physical structure. We start with the foundation, which is the bottom layer and is the most important thing in order to keep the structure up and strong. With the core, it’s the exact same concept and breathing is our foundation.
You may be slightly surprised that breathing is such an important part of this core training hierarchy, I was too. But then someone took me through what true diaphragmatic breathing looks like and I was winded.
That’s when I had my reality check on what a truly functional core was.
Now, this doesn’t necessarily mean that if you haven’t mastered diaphragmatic breathing you cannot ever have a plank or sit up in your training session. It just means that if you want your core to be truly optimized, these are the principles used when you train it.
At the end of the day, there’s no holy grail of rules to training.
Every client is different, every situation is different, and even though studies are a great tool for us coaches, experience is just as great – you need to learn, adapt, and do what works best for you for where you’re currently at in your training.
But I still suggest starting with the foundation and moving up the pyramid as you build the skill and strength in each level.
How can you tell or know when to move on?
Unfortunately there is no test or score we can give them, this isn’t the FMS, so this will come down to mostly your best personal judgment. But here are some example questions I’ll use with clients as they’re building their core….
Coaching Cue’s Checklist For Proper Breathing:
“When you’re practicing the breathing, do you feel it more so in your lower abdominal region or still up in your chest” – Lower Ab would be the correct answer.
“Have your inhales and exhales gotten longer since you first started?” – Answer should be yes.
“During the plank hold (bracing), do you feel it in your abs now or still very much in your lower-back? Are you holding the plank for longer than before?” – Answers are abs and yes, longer.
“During the anti movement exercises, have you increased resistance or weight used? Longer duration? Feel stronger?” – Yes, Yes, Yes!
“Can you perform more sit ups than before? Have you loaded your sit ups and flexion based movements?” – Definitely!
“When you do your loaded carries, are you using heavier weights or walking for longer distances?” – Yes to both!
See no matter which level we’re on or what we’re performing, general strength progression will be the best determination of mastering the level. When you’re proficient and clearly progressing, move onto the next level in the pyramid.
And remember, this is optimal… Doesn’t mean you can’t run through breathing at the beginning of your session and still have a plank in there, even though they haven’t mastered breathing. Just be smart and prioritize the level and step you’re currently on.
Now let’s move onto some practical application of these Core Training Principles.
Diaphragmatic Breathing
Nothing will be supported nor successfully built without the bottom layer, the foundation. In terms of core training, breathing makes up that foundational layer, and that is always going to be the most important thing to work on when you’re trying to achieve a strong core.
This means before you give your clients cool exercises, you should have them practice their breathing. Breathing isn’t cool and sexy, but it’s the most important thing because it is what helps contribute to better posture, works the deepest core muscles we have, works our central nervous system, builds strength in our pelvic floor and abdominals, and it releases tension in our chest, shoulders and neck from breathing improperly.
Watch the video below and pay special attention to his application of this into the squat. Then imagine yourself in your own movements in the gym so you can focus more on the breathing aspect when you’re lifting.
This is an easy thing to add into your warm-ups and something you can even practice at home. Start your warm-up by lying on your back, putting your feet up on the wall in a 90-degree knee flexion, and practice breathing through your lower abdomen region while pressing your low back into the floor.
Some cues to think about while you’re doing this would be having holding your hands on your lower stomach, just above your hip flexors. This is a good place to press against lightly, even tapping your fingers will help to give yourself some external feedback – like a marker to breathe into.
Sounds odd, but you can also simply think about breathing through your crotch. I’ll tell my guys to breathe through your balls and it’s like a light bulb went off instantly.
So as weird as it is for me to say, it work so well I keep it as a coaching cue!
Make sure you’re keeping calm and relaxed; some people can get kind of worked up if they’re really inefficient with breathing and it can actually create a sense of anxiety or struggle.
So here’s the rundown:
- Inhale very slowly, filling that pocket up against your hand
- Hold at the top for 1-2 seconds
- Finally, exhale out as slowly as possible attempting to exaggerate the duration of that breath.
- While you’re exhaling, pull your ribcage down towards your waistline.
This would be a single rep, performing anywhere between 5-10 reps seems to be plenty for most. You know you’re progressing when your breaths, in and out, get longer and longer. But this isn’t something you move away from, no matter how efficient you get – keep practicing it prior to training.
Bracing / Anti-Extension
Bracing-based exercises are probably the most total core based exercises you can do and by far have the most strength pay off. The cool part is that they’re the most simple as well. We’re talking about exercises like planks, dead-bugs, and ab wheel rollouts here.
Think of bracing as tension, that’s our goal here… Get in a stable position, such as a variation of a plank, and create as much internal tension in your body, specifically the core and abs, as possible.
You can do this on your elbows, on your hands, with 1 hand and 2 feet, 2 hands and 1 foot, or even standing (try grabbing a heavy sandbag or zercher bar loaded up, then pull ribcage down and create that internal tension… Just stand there and brace… It’s brutal!).
The main take away here is that being able to hold a stable position while bracing or creating tension isometrically, is a foundational function of the body. It allows us to create internal tension, become aware of muscular contractions in the core, resist external movements or force, and most importantly it allows your body to be safe during heavy lifting.
The video below is an excellent demonstration of HOW to show a client to position their body, specifically their hips and low back, while they plank. No matter what type of plank or bracing based exercise you have them do, you want to “tuck your tailbone” and “pull your ribcage down”. It’s as if you’re aiming to bring your tailbone to your belly button and by doing this, you create a posterior-pelvic tilt, eliminating an anterior-pelvic tilt and lessening the likelihood of your abs becoming disengaged, while your lower back takes the brunt force of the exercise. It can also help to drive your elbows into the floor and squeeze both your glutes, as well as your quads, to lockout the entire lower body and ultimately create total body tension while bracing and holding the plank.
Anti-Rotation Exercises
Ahhhh here we go, a little sexiness creeping into the scene now. Anti-movement based exercises can be pretty cool, extremely challenging and once again have huge payoffs for a ripped up functional core and total body strength.
These are another form of bracing and creating internal tension, just like described in the bracing section above, but these exercises use external movements or resistance which attempt to force us out of that position.
In other words, it’s the next level up from a plank (clearly) and it’s important to understand that – so you usually wouldn’t want to do a difficult anti-rotation exercise, if you cannot plank for longer than 30 seconds with proper form.
The biggest benefit and payoff here is that it’s bracing against external forces. Meaning you will be able to not only create the internal tension and isometric strength, but be able to apply it to something attempting to force you out of that position and tension.
The video below is a great example of anti-movement, this one is specifically anti-rotation and can be done even slower for a more controlled tension.
These can even be added in more simply than almost any other “core exercise” because it can be as simple as doing a Kettlebell squat in an offset racked position or holding a dumbbell on one side, instead of both. What this does is simple – it tries to force your body one way, as you’re loaded on only one side. Then, it’s your core’s job to avoid any unnecessary rotation.
But, it can also get much more intense when we add things like landmine bus drivers or pallof press variations. The bus driver is the exact thing in the video above, so check that out, and the pallof press is even simpler.
Take a band or cable, set it up at chest/shoulder level height, and then rotate out, keeping your elbows locked out, until you reach a straightforward position. The cable or band is clearly pulling you back toward the direction it came from, but you will hold that handle tight and resist the rotation.
This is an example of an isometric anti-rotation, which can be even easier to perform. Below is another video to help you visually:
Spinal Flexion Exercises
Ok, now we’re getting familiar…. Sit-ups variations, we all know these!
Surprisingly enough, most people do not perform these properly. They actually do not even flex the spine while they sit up, they often just attempt to sit up off the floor and can even hyperextend the lower back at the top of the movement.
But if we do not literally flex at the spine, compressing the rib cage down, we’re not performing the sit up, or any flexion based core exercise, properly.
So next time you perform a sit up or crunch, try pulling the ribcage down and exhaling as you perform this – you will find a greater mind muscle connection to your abs and will get a lot more benefit out of your sit up.
But remember, if we don’t nail down the foundations and pyramid blocks below this – then these will be much less beneficial to our clients’ physique and strength because the cues needed to optimize the crunch become easier when we move through the hierarchy properly.
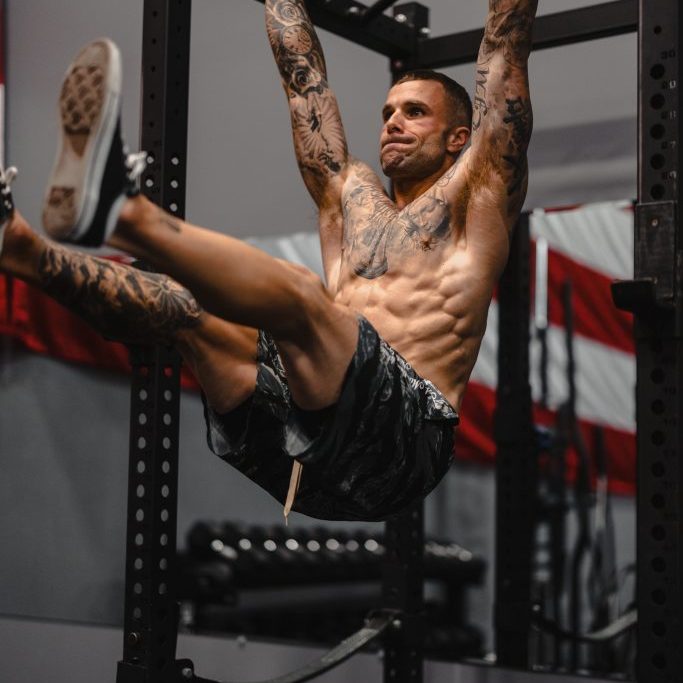
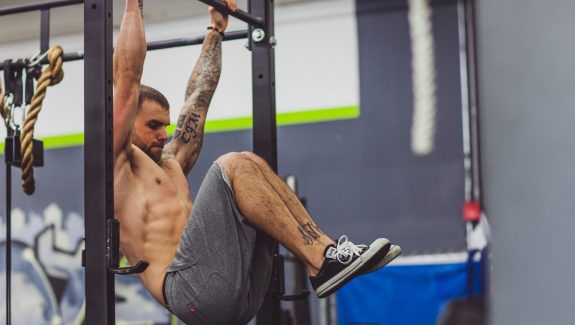
Below is a great example of a simple exercise, the ab crunch, done optimally to achieve better ab hypertrophy. As you notice I am not sitting up very high, but merely crunching my abs by flexing (rounding) my spine and contracting the muscle. If you were to do a more advanced approach you could add a weight to your chest for resistance or perform hanging knee raises, which is the same function (spinal flexion) but in the opposite direction (knees to shoulders vs. shoulders to knees).
Loaded Carries
Lastly we have something that is VERY underrated and even though it is at the peak of the pyramid, being the smallest section; it is still a very crucial and important part of training that should be included into everyone’s training program.
Loaded carries are not only a great core stimulator, but they’re also a total body exercise.
Depending on the variation, they can light up your shoulders, traps, rhomboids, lats, arms, and of course the entire core. To add to that, they’re a great fat loss tool as well – in fact, they may be the best core exercise when it comes to burning calories and losing body fat.
I’m going to provide a video of my favorite variation, but before I do I need you to remember something… Don’t over complicate or over think this! It’s literally so simple.
Grab a pair of heavy kettlebells or dumbbells, get in a great posture, and then walk while creating as much internal tension in your core, arms, upper back, etc… Or you can even do a racked walk. This would be holding a sandbag or pair of kettlebells, in a front-racked position, pulling your ribcage down and again, simply walking with a good posture.
You can do heavy loaded shorter distances or you can do a lighter load while walking a very long distance. They’re both excellent and should be implemented in majority of your clients training programs.
The variation below is one of my personal favorites, called a Chaos Farmers Walk. We’re accomplishing the same benefits of a normal farmers walk, but adding the instability of a band which is going to recruit more of the upper back and scapular-stabilizing muscles as well as the core.
How To Program Ab Training Into Your Workouts
Ok, now that we’ve run through just about everything there is to know about the core and how to train it. Now let’s finish off with some actual programming so you can apply these great tools into training a.s.a.p.
Below are “Core Finishers” that can be added to the end of your strength training days or on your cardio days as something to start the session with.
I’ve broken them down into Levels 1, 2, and 3 – the rationale being that if you’ve never really implemented serious core work, start them with level 1.
Remember that the minimal effective dose for results is always best.
As you progress, move forward through the levels to challenge your core a bit more as you build strength.
Remember that coaching cue checklist? The things I ask my client when implementing each type of exercise and phase of the core training?
Those would be your measurements here in determining whether or not you’re ready for the next level. Simply put – use your best judgment and personal performance, as you get better and stronger you can move onto the next level of core training and the next level of programming below.
Level 1
Day 1
| Exercise | Sets/Reps | Notes |
| Cable Crunches | 3-4 x 15-20 | Crunch down – fully exhaling – face away from cable machine –use rope attachment |
Day 2
| Exercise | Sets/Reps | Notes |
| LLPT Plank Hold | 3-4 x 30-60 Sec. | Pull ribcage down – tuck tailbone – squeeze glutes tight – hold position, while bracing tight |
Day 3
| Exercise | Sets/Reps | Notes |
| Farmers Walks | 3-4 x 3 Min. | Pull shoulders back – keep tall posture – fully grip weight – slowly walk for 3 minutes non-stop, slightly lifting knee’s up while stepping |
Level 2
Day 1
| Exercise | Sets/Reps | Notes |
| 1.) Cable Crunches | 3-4 x 15-20 | Crunch down – fully exhaling – face away from cable machine –use rope attachment |
| 2.) RKC Plank | 3-4 x 30-60 Sec. | Pull ribcage down – tuck tailbone – squeeze glutes tight – hold position, while bracing tight |
Day 2
| Exercise | Sets/Reps | Notes |
| 1.) LLPT Plank Hold | 3-4 x 30-60 Sec. | Pull ribcage down – tuck tailbone – squeeze glutes tight – hold position, while bracing tight |
| 2.) Sprinter Sit Ups | 3-4 x 10 Side | Constant tension in abs – faster pace sit ups |
Day 3
| Exercise | Sets/Reps | Notes |
| 1.) Hanging Knee Raises | 3-4 x 8-12 | Hanging from bar, reverse crunch your torso as you lift up your legs – initiate movement with your abs and NOT your hip flexors |
| 2.) Heavy Farmers Walks | 3-4 x 40-60 Yards. | Pull shoulders back – keep tall posture – fully grip weight – slightly lift knee’s up while stepping |
Level 3
Day 1
| Exercise | Sets/Reps | Notes |
| 1a.) Cable Crunches | 4 x 15-20 | Crunch down – fully exhaling – face away from cable machine –use rope attachment |
| 1b.) RKC Plank | 4 x 30-60 Sec. | Pull ribcage down – tuck tailbone – squeeze glutes tight – hold position, while bracing tight |
Day 2
| Exercise | Sets/Reps | Notes |
| 1a.) Sprinter Sit Ups | 4 x 10 Per Side | Constant tension in abs – faster pace sit ups |
| 1b.) Palloff Press Hold | 4 x 30 Per Side. | Pull ribcage down – tuck tailbone – squeeze glutes tight – hold cable or band with elbows locked out straight from your chest level height |
Day 3
| Exercise | Sets/Reps | Notes |
| 1a.) Hanging Knee Raises | 4 x 8-12 | Hanging from bar, reverse crunch your torso as you lift up your legs – initiate movement with your abs and NOT your hip flexors |
| 1b.) ½ Racked KB Farmers Walks | 4 x 40-60 Yards Per Side | Pull shoulders back – keep tall posture – fully grip weight – slightly lift knee’s up while stepping |
